Manage transfers
You can manage an end user's transfer permissions by going to .
You can also turn outbound and inbound transfers on or off, or turn member-to-member transfers (for credit unions) on or off. To turn those features on or off, visit the Permissions section on an end user's Overview screen.
You can complete the following actions.
- Turn internal and external transfers on or offCAUTION:If your institution has both outbound and inbound transfers activated on the institution Settings screen, turning off outbound transfers for an individual user also turns off inbound transfers.
- Turn member-to-member transfers (only applicable for credit unions) on or off
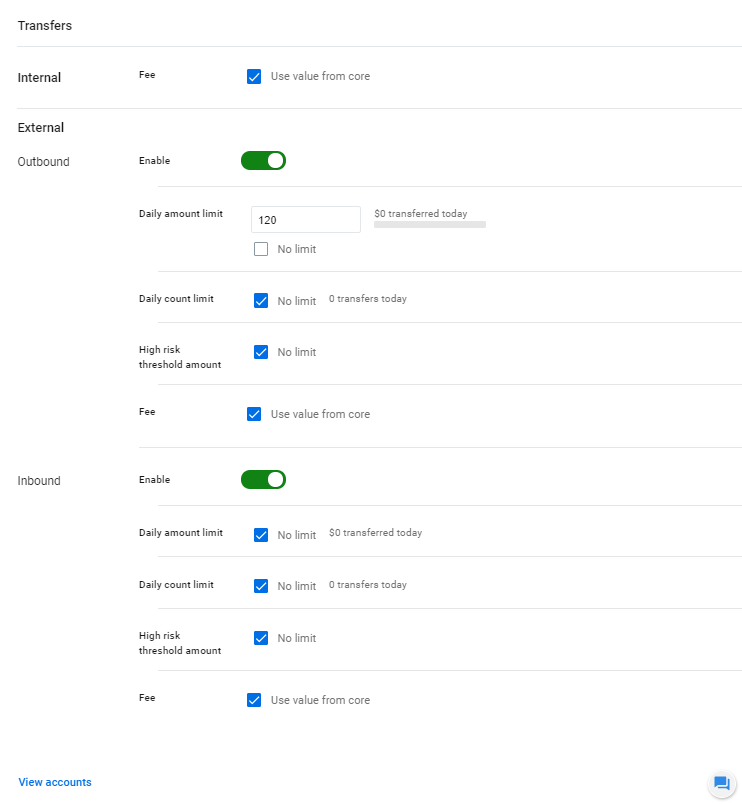
- Add a fee for internal or external transfers
- Add a daily limit for external transfers
- Set a high-risk threshold amount
CAUTION:
After changing something in
a text input field in the Transfers section, select
Reset to change the
user's information back to match your institution's default settings. If you manually type the
same value as the institution default, the user's information will not sync correctly.
Note: The transfer settings you establish in only apply to that user. However, you can set global transfer settings by
visiting .