Using our customizable ad templates, Banno Marketing helps you create ads
promoting your products and services within Banno Online and Banno Mobile.
Ads are housed within campaigns, so you
need at least one campaign created before attempting to create an ad.
Note: The
Templates screen only appears in the premium version of Banno
Marketing. To upgrade to the premium version, contact a representative at
digitalexperience@jackhenry.com.
-
Select
Campaigns in the Marketing navigation.
-
Select Digital banking.
-
Select an existing campaign by selecting the campaign name.
Tip: Use the
Search box to find a campaign using text from the campaign's name,
keywords, or description.
-
Select Create an ad.
-
Choose an ad template by selecting it to make a check mark appear.
-
To begin building the ad, choose Select ad.
-
Complete the fields in the form.
Note: Some ad templates do not have all the following fields. Complete the
fields relevant to the selected ad template.
- Name your ad
- Descriptor for this specific ad.
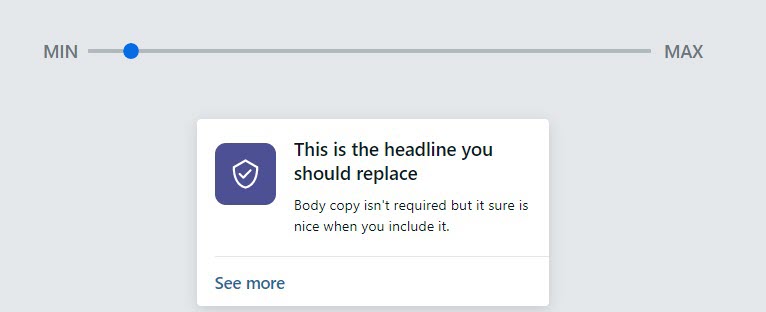
- Headline
- Text to be used for the ad's headline.
- Body copy
- Additional text to be used in the body of the ad.
- Select an icon
- Using the Select an icon button makes the
Select icon window appear, where you can add an icon
to appear with your ad.
- Call to action
- This is the text that appears that describes the action you want the
viewer to take as a result of your ad. Some examples might be See
more, Apply now, Contact us,
Open an account, and so on. This text takes a person to the
location you reference in the Link to field.
- Link to
-
Set the link to direct users to one of the following.
- One of my pages: Select a page from your website in Banno
Content.
- Website URL: Enter the full URL for the external website.
- App feature: Select an application route from your list of available
options.
- External application: Select an external application from your list
of available options.
-
Review the ad preview to ensure that the ad looks correct and that links work as
expected.
Note: Use the
Min and
Max slider to preview the look
of your ad for different screen sizes.
-
Select Save and finish.
CAUTION:
Save and finish stays inactivated until you
complete all required fields.
The ad is saved and the ad Details screen appears.